Mastering Edge Node Launcher: A Step-by-Step Tutorial
For Node Operators
Education

Running your first Ratio1 edge node is an exciting milestone - you're now contributing to a decentralized AI network! Understanding and managing your node effectively is crucial, and the Edge Node Launcher simplifies this with an intuitive, user-friendly interface. In this beginner-friendly tutorial, we'll guide you step-by-step through downloading the launcher, setting it up, and using it to view your node's information such as address, Ethereum address, performance metrics, and more.
Step 1: Download the Edge Node Launcher
First, head over to the official Ratio1 downloads page. Choose your operating system (Windows, macOS, or Linux) and download the Edge Node Launcher.
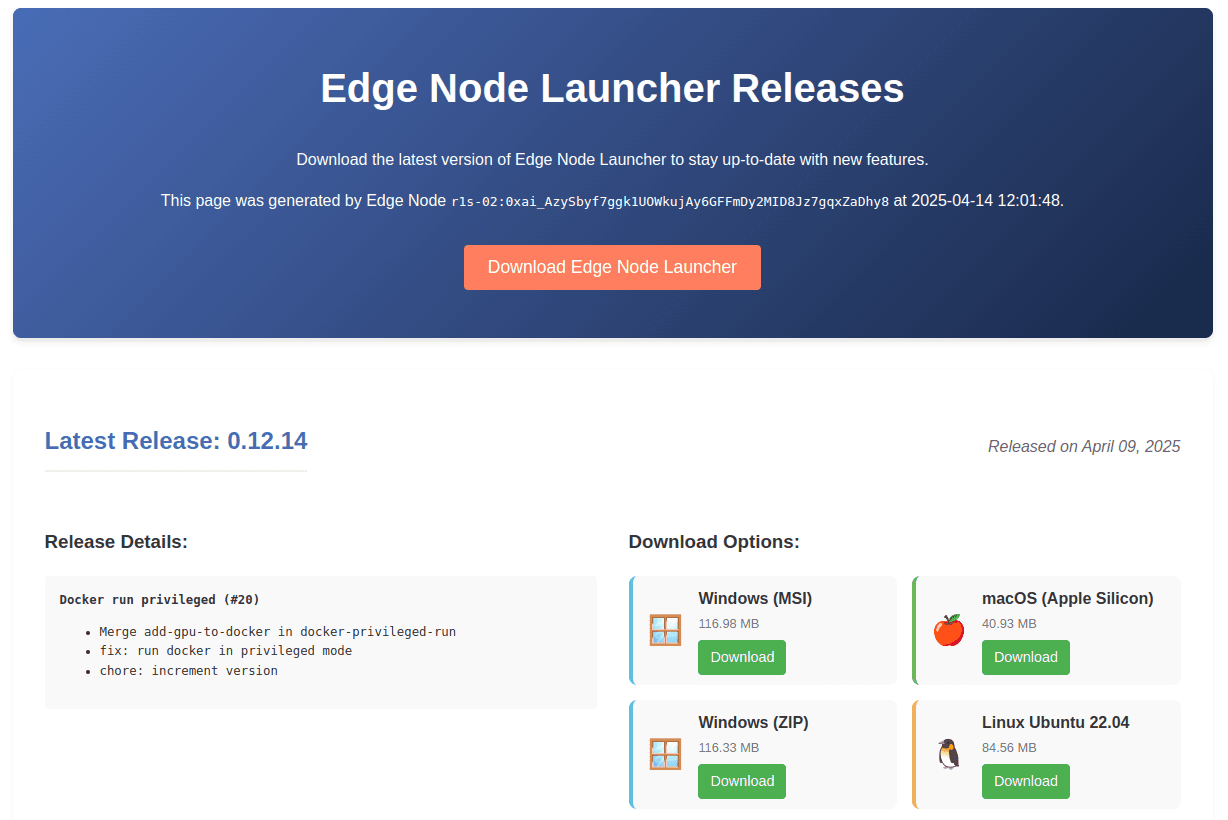
Description: Screenshot of the Ratio1 downloads page with Edge Node Launcher clearly marked.
Step 2: Ensure Docker is Installed
Before launching your node, you must have Docker installed and running. Docker allows the Edge Node Launcher to manage your node container effortlessly.
When opening the Edge Node Launcher, it automatically checks for Docker. If Docker isn't running, you’ll see the following prompt:
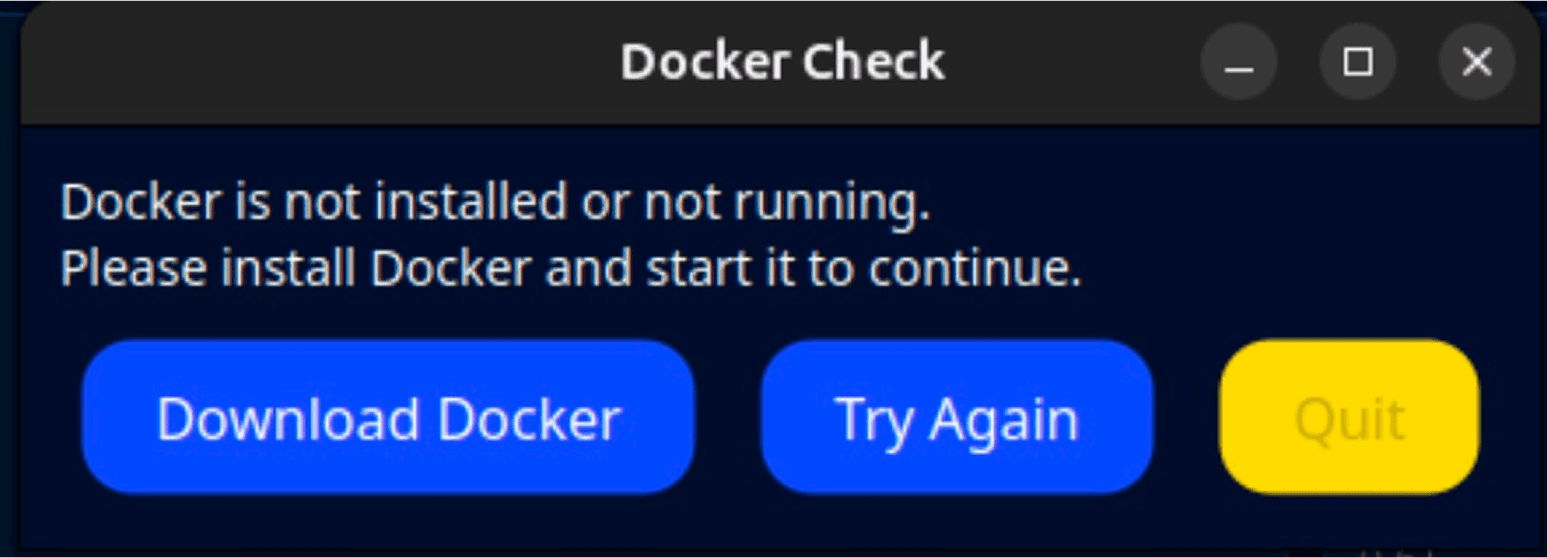
Description: Notification window prompting Docker installation or startup.
Simply click "Download Docker" if you don't have it already, or ensure Docker is running, then click "Try Again".
Step 3: Launch the Edge Node Launcher
Open the Edge Node Launcher app. You'll see the main dashboard, which allows you to manage, monitor, and interact with your nodes seamlessly.
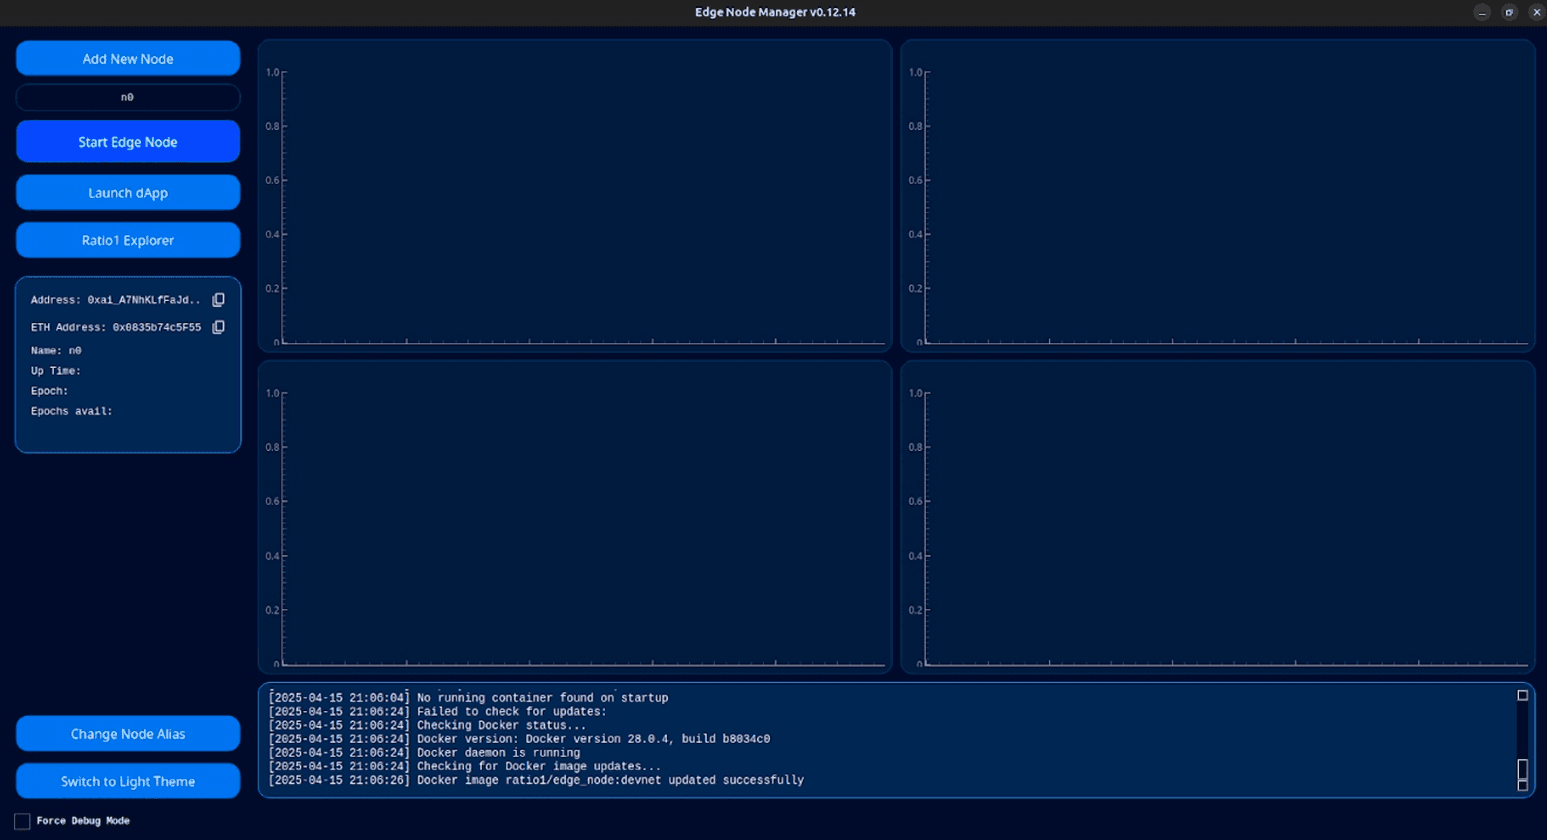
Description: The main UI showing node actions and details clearly, with the option to start a node.
Step 4: Start Your Node
Click "Start Edge Node". The launcher will initialize your node, automatically downloading necessary components and setting up the environment. Shortly after, you’ll see real-time status updates, performance charts, and detailed node information displayed clearly.
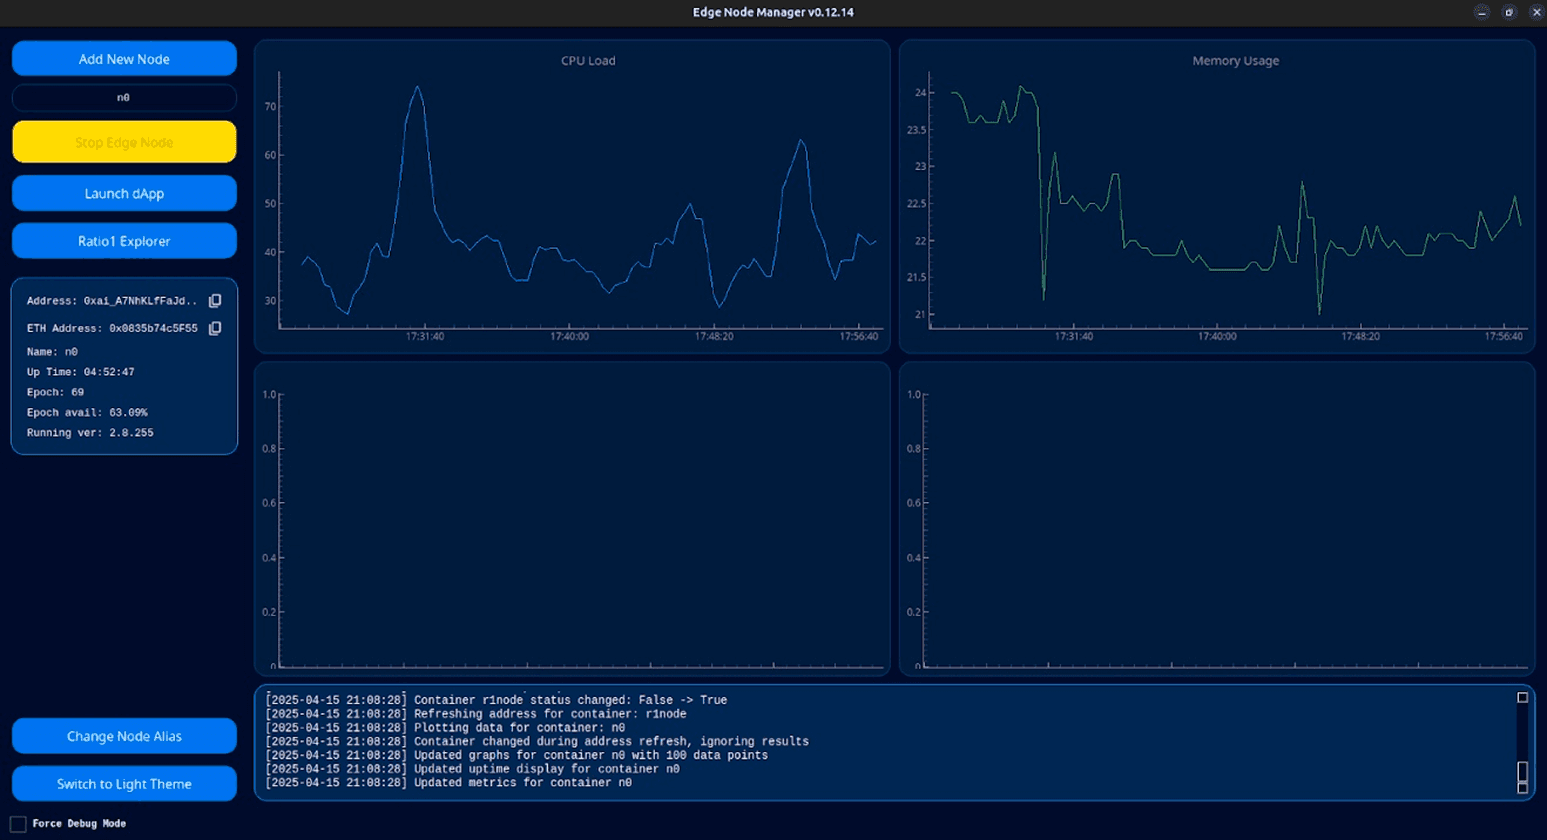
Description: Interface displaying details of a running node with real-time CPU load, memory usage, and other vital statistics.
Step 5: Review Your Node Information
The left-hand panel will display essential node details, providing quick access to important data:
Address: Unique Ratio1 node network identifier.
ETH Address: Ethereum address required for linking your node license.
How to link your node license to your node tutorialUptime: Duration for which the node has been operational.
Epoch Information: Current epoch and availability statistics.
Running Version: The current version of your node software.
These details are vital for tasks like license linking, node identification, and performance tracking.
Step 6: Customize Your Node Alias
To make managing your node easier, especially if you operate multiple nodes, give your node a personalized alias. Click "Change Node Alias" and enter a friendly, easy-to-remember name.
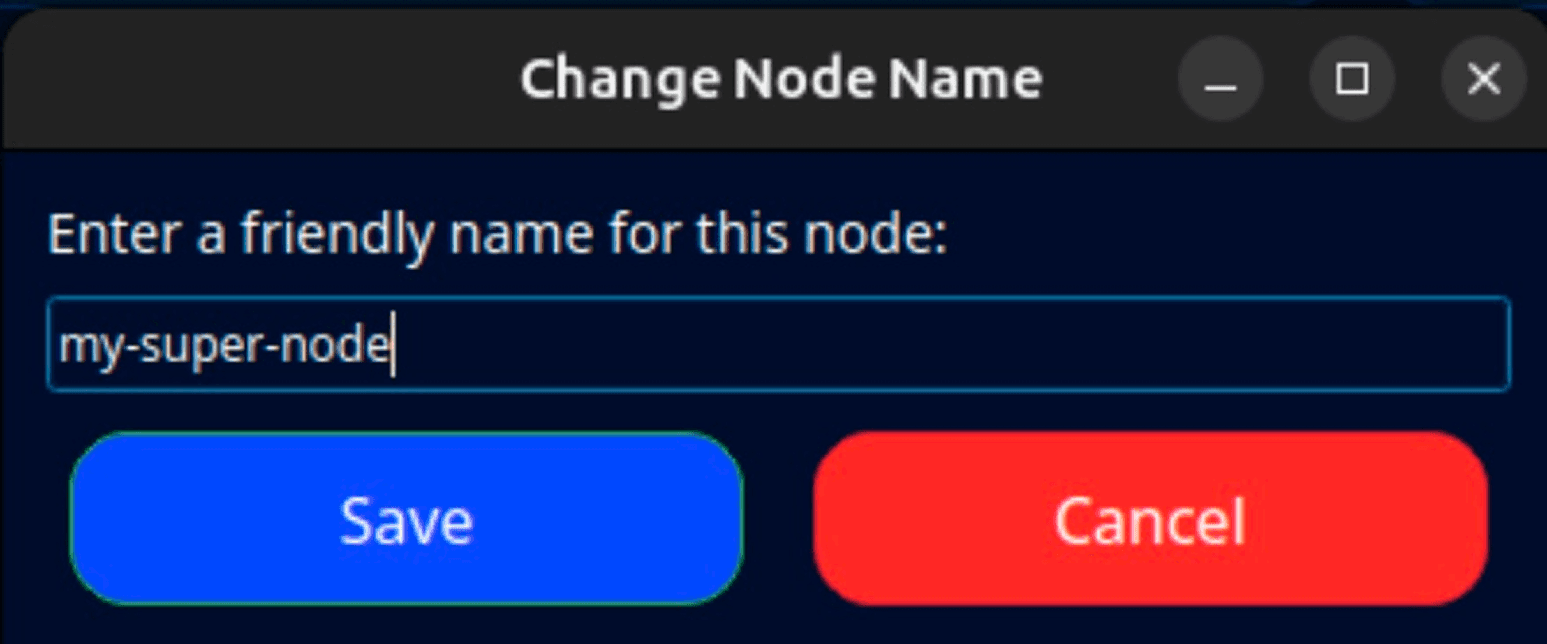
Description: UI prompt allowing the user to enter a custom alias for their node.
Step 7: Managing Multiple Nodes
⚠️ Important Note About Running Multiple Nodes
While the Edge Node Launcher allows for the management of multiple nodes, we strongly discourage running multiple nodes on the same physical machine. Doing so can lead to resource contention, degraded performance, and unexpected behavior.Ratio1 does not offer support for issues arising from multiple nodes operating on the same device/VM. For best performance and stability, run only one node per machine.
If you're running several nodes simultaneously, the Edge Node Launcher conveniently lists them, providing quick and easy access. Simply select the node you want to view or manage.
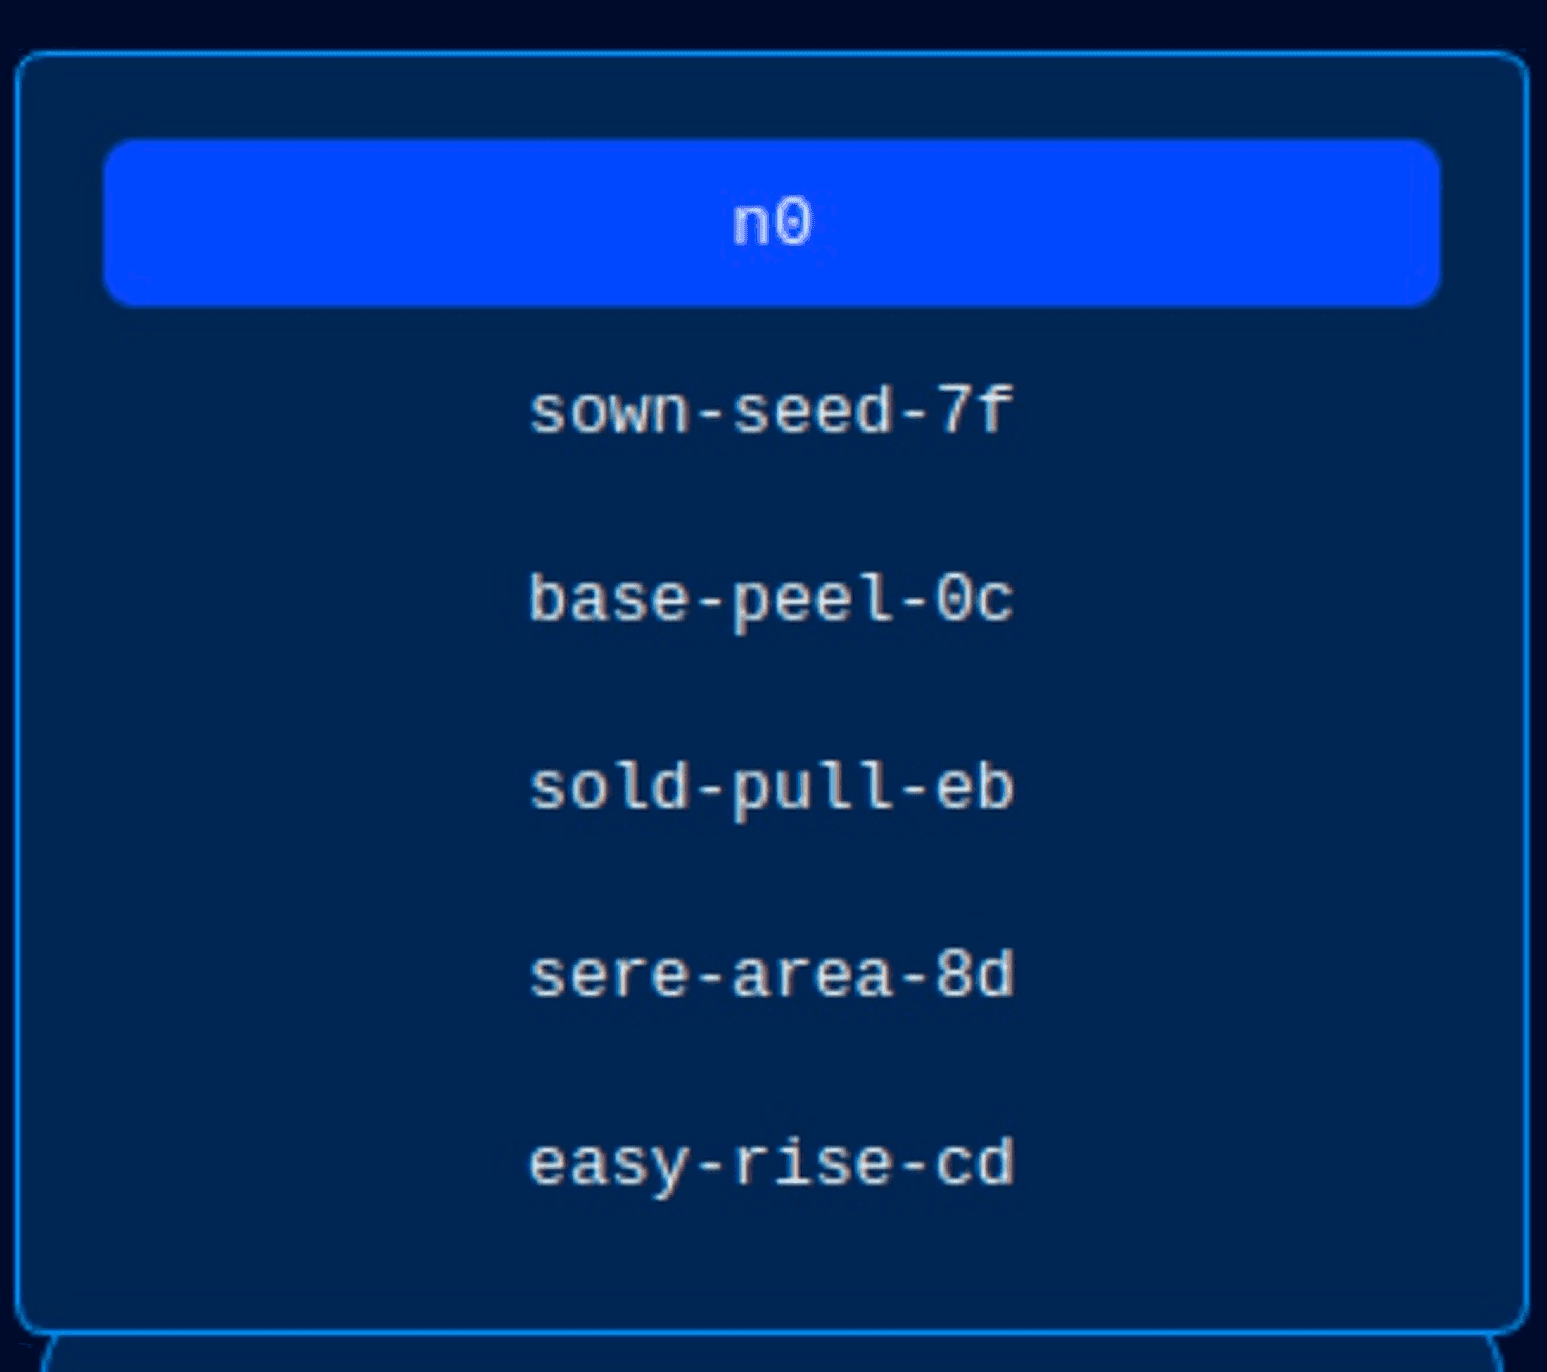
Description: Clear listing of multiple running nodes within the UI, making node management straightforward.
Step 8: Monitor and Optimize Performance
Regular monitoring is important to ensure optimal performance. Keep an eye on the CPU and memory usage charts provided by the launcher. This allows you to detect potential issues early and maintain peak performance.
Troubleshooting and Support
If you encounter issues or have questions about managing your nodes, refer to the comprehensive documentation or reach out to the Ratio1 community and support team directly through provided channels on their official website.
Conclusion
With Edge Node Launcher, managing your Ratio1 node becomes easy and accessible, even if you're completely new to decentralized networks and Docker technology. This user-friendly interface removes technical barriers, empowering everyone to contribute effectively to the Ratio1 network.
Happy node running!

Vitalii Toderian
