R1DB: From Deployment to Your First Database
General
Education
An online shop needs somewhere to keep orders. A CRM needs contacts. A device application needs readings. R1DB gives those applications a distributed SQL database on Ratio1, with a browser dashboard and connections for PostgreSQL-compatible clients.
Deeploy sets up the cluster across your selected edge nodes. You can then create databases and query data without opening a shell on those machines. R1DB is based on CockroachDB's open-source engine; it is not a PostgreSQL server, so check compatibility for the SQL and extensions your application uses.
Deeploy your cluster
Start with a funded Deeploy project and its tunneling secrets configured. New to the platform? Follow the Deeploy setup guide first.
In Deeploy, add a Service job and choose R1DB.
In Specifications, choose resources and at least three nodes. Set Cost & Duration, then continue to Deployment.
Manually select the same number of distinct, online nodes, preferably on different machines. They need enough capacity and synchronized host clocks.
Keep Public Service enabled and generate or select a TCP tunnel for SQL connections. Enter a database name such as
appdb, a user such asapp_user, and a unique password. Store the credentials securely.Review the job, complete payment, and wait for all selected instances to run.
Deeploy prepares the peer connections, TLS certificates, and a separate HTTPS console tunnel. Your initial appdb database already exists when setup finishes; creating another database is optional.
The examples below use appdb and app_user; substitute your chosen names.
Open the dashboard
In the running job's Deployment section, click Open R1DB Console. Sign in with the same database user and password you chose during deployment, not your wallet credentials. Set Database to appdb, replacing the console's defaultdb value.
The console keeps the essentials close:
Overview shows your database, user, table count, and engine version.
Tables lists tables and schemas. Click Refresh after creating a table.
SQL runs queries and displays their results or errors.
Open SQL and click Run query with:
SELECT current_user AS username, current_database() AS database_name;You should see your user and appdb. A successful query confirms you can use the database; it is not a full cluster failover test.
Make room for your use case
You can use appdb immediately, or organize a separate workload in another database. Here is a small shop example. Stay signed in as app_user and run each SQL block separately, using Run query each time.
Create the database:
CREATE DATABASE shop;If shop already exists, choose another example name throughout; do not delete existing data to repeat the walkthrough.
Create an app schema to group tables under your ownership:
CREATE SCHEMA shop.app;Add an orders table:
CREATE TABLE shop.app.orders (
  order_id UUID PRIMARY KEY DEFAULT gen_random_uuid(),
  customer_email STRING NOT NULL,
  total DECIMAL(12, 2) NOT NULL,
  status STRING NOT NULL DEFAULT 'new',
  created_at TIMESTAMPTZ NOT NULL DEFAULT current_timestamp()
);
Store a sample order:
INSERT INTO shop.app.orders (customer_email, total)
VALUES ('[email protected]', 49.90);
Read it back:
SELECT customer_email, total, status
FROM shop.app.orders
ORDER BY created_at DESC
LIMIT 10;
The result contains the sample buyer, amount, and new status.
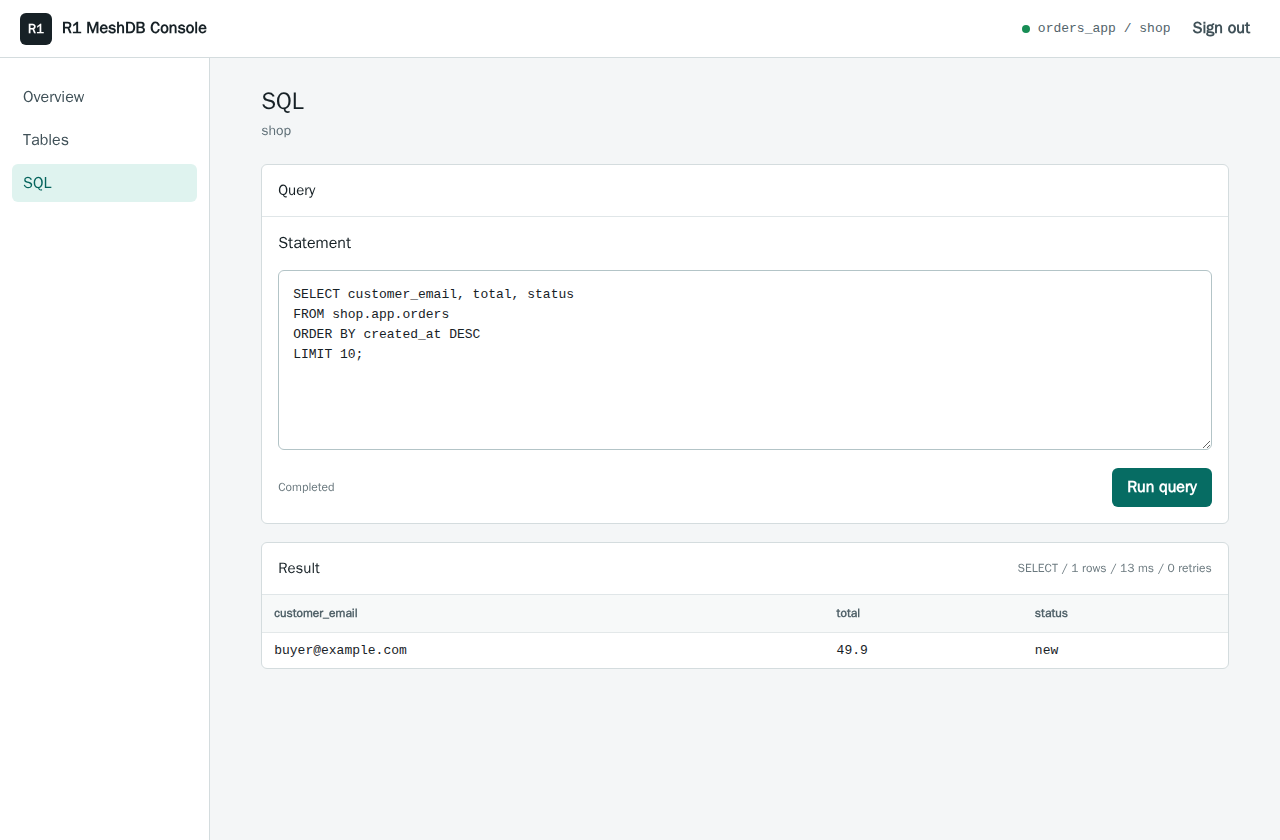
The same query shown with orders_app, the separate application login covered in the full guide.
To browse the table in Tables, sign out and sign back in with Database set to shop. Console queries do not share a persistent SQL session, so use fully qualified names such as shop.app.orders rather than relying on USE.
The same pattern works for crm or telemetry. These are databases within one cluster, not new deployments: they share capacity and users, and their names alone do not provide tenant isolation.
Connect your application
Use the job's SQL endpoint for your application, not its console URL. Click Download CA certificate in Deployment and configure your SQL client with the assigned host and port, database, credentials, and r1db-ca.crt. Enable verify-full or equivalent CA and hostname verification; do not bypass TLS errors.
Keep the deployment user for setup. Give your application a separate login with only the table permissions it needs. User creation and password changes require a SQL client such as psql, not the console editor. The database walkthrough covers that setup and a verified-TLS connection example.
Before storing important data, keep backups outside the cluster and extend the job before expiry. Replication is not a backup, and a fresh deployment does not automatically recover an expired job's data.
Continue with the full R1DB guide for detailed steps. This walkthrough reflects the R1DB 1.0.2 console.

Cristian Bleotiu
